🔹 Step 1: Components Needed
- Arduino Uno (or Nano) – 1x
- DHT11 Temperature & Humidity Sensor – 1x
- 16×2 LCD with I2C module – 1x
- Jumper wires – some
- Breadboard – optional
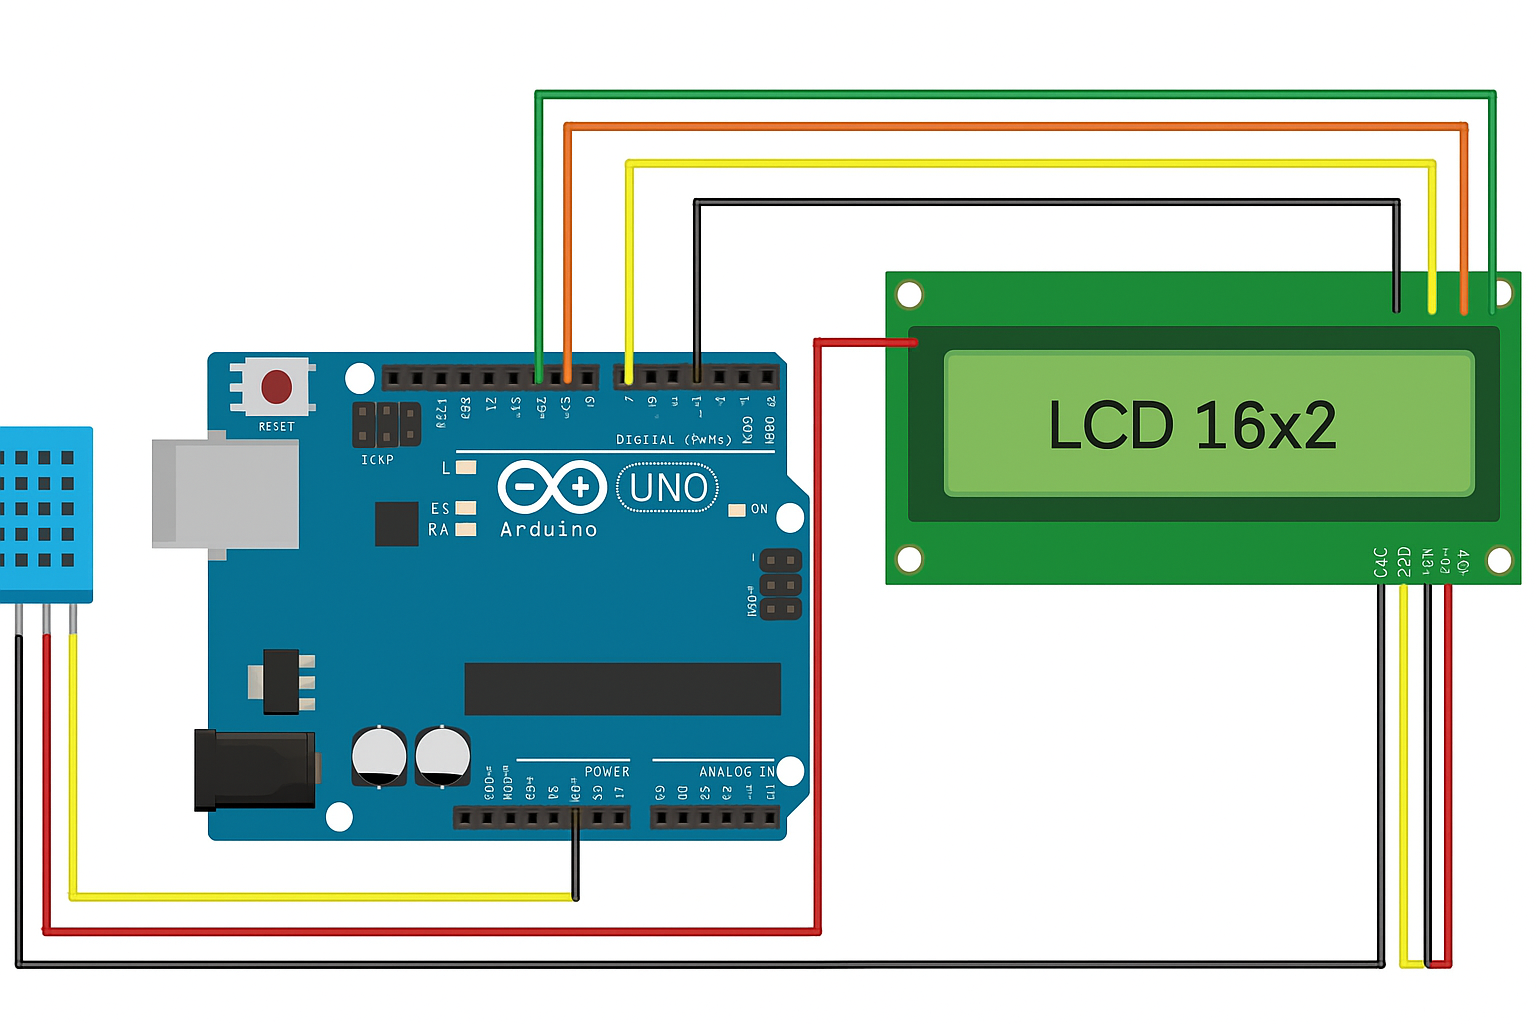
🔹 Step 2: Wiring Diagram (Connections)
DHT11 → Arduino
- VCC → 5V
- GND → GND
- Data → D2
I2C LCD → Arduino
- VCC → 5V
- GND → GND
- SDA → A4
- SCL → A5
🔹 Step 3: Arduino Code
#include <Wire.h>
#include <LiquidCrystal_I2C.h>
#include <DHT.h>

#define DHTPIN 2       // DHT11 data pin connected to D2
#define DHTTYPE DHT11  // Using DHT11 sensor

DHT dht(DHTPIN, DHTTYPE);
LiquidCrystal_I2C lcd(0x27, 16, 2);  // LCD at I2C address 0x27

void setup() {
  lcd.init();        // Initialize LCD
  lcd.backlight();   // Turn on backlight
  dht.begin();       // Start DHT11 sensor
  lcd.setCursor(0,0);
  lcd.print("Temp & Humidity");
  delay(2000);
  lcd.clear();
}

void loop() {
  float h = dht.readHumidity();
  float t = dht.readTemperature();

  // Check if any reading failed
  if (isnan(h) || isnan(t)) {
    lcd.setCursor(0,0);
    lcd.print("Sensor Error!");
    return;
  }

  lcd.setCursor(0,0);
  lcd.print("Temp: ");
  lcd.print(t);
  lcd.print(" C");

  lcd.setCursor(0,1);
  lcd.print("Hum: ");
  lcd.print(h);
  lcd.print(" %");

  delay(2000); // Update every 2 seconds
}
🔹 Step 4: How It Works
- The DHT11 sensor reads temperature and humidity.
- Data is sent to the Arduino UNO.
- Arduino sends values to the LCD via I2C.
- The display refreshes every 2 seconds, showing Temp (°C) and Humidity (%).
🔹 Step 5: Next Upgrades (Optional)
- Add a buzzer if temperature exceeds a limit.
- Add an SD card module to log data.
- Send readings to a mobile app or cloud via ESP8266 WiFi module.